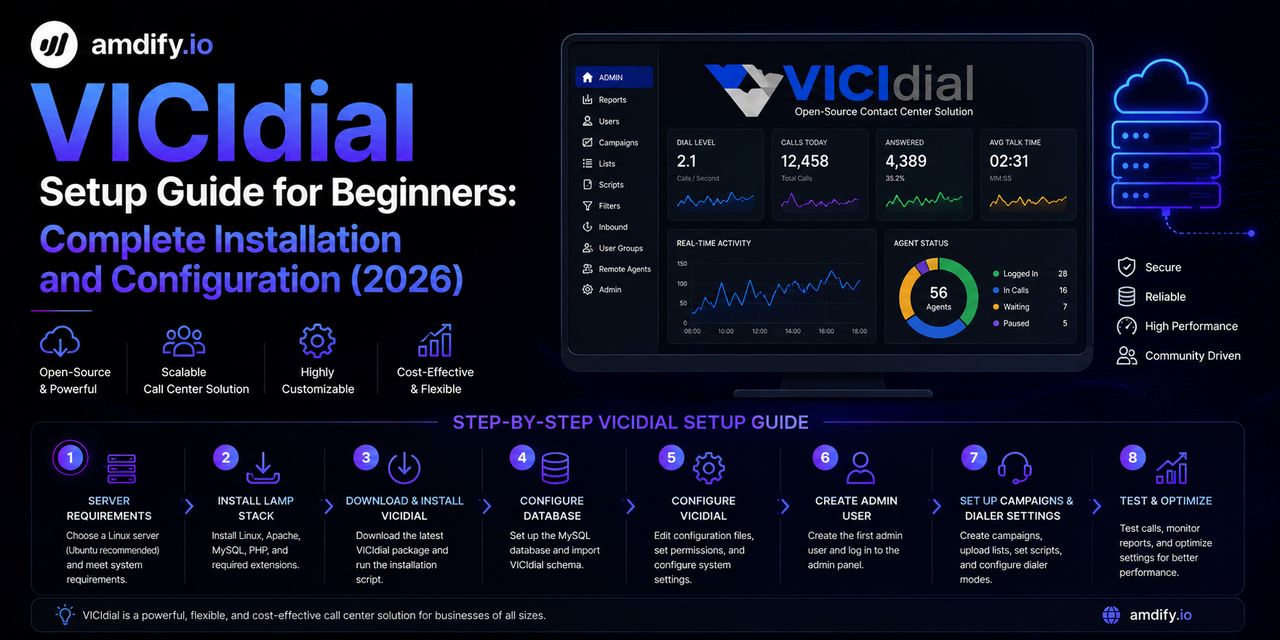
VICIdial Setup Guide for Beginners: Complete Installation and Configuration (2026)
VICIdial is the most widely deployed open-source contact center platform in the world. It is free to download, runs on standard Linux hardware, and powers outbound and inbound calling operations from small 5-agent teams to enterprise operations with hundreds of seats.
If you are setting up VICIdial for the first time, the learning curve can feel steep. The admin panel has hundreds of settings. There are multiple ways to configure the same thing. And the official documentation is scattered.
This guide covers the essential steps to get VICIdial installed, configured, and running your first outbound campaign — in plain language, with no assumptions about your prior Asterisk or Linux experience.
What Is VICIdial?
VICIdial is a contact center suite built on top of Asterisk, the open-source telephony engine. It provides:
- Outbound predictive, power, and progressive dialing
- Inbound call queuing and IVR
- Agent web interface (agents work in a browser)
- Campaign management for organizing call lists
- Reporting and call recording
- AMD (Answering Machine Detection) via Asterisk
VICIdial is used heavily in Pakistan, India, Philippines, Egypt, and across Latin America because it is free and highly customizable. The core software is open source — you pay only for your server and SIP trunking.
System Requirements
For a basic installation supporting 5–20 agents:
| Component | Minimum | Recommended |
|---|---|---|
| CPU | 4 cores | 8 cores |
| RAM | 8 GB | 16 GB |
| Storage | 100 GB SSD | 500 GB SSD |
| OS | CentOS 7 / AlmaLinux 8 | AlmaLinux 8 |
| Network | 10 Mbps | 50+ Mbps |
| IP Addresses | 1 static public IP | 1 static public IP |
For larger operations (50+ agents), you will need to scale the server accordingly. VICIdial also supports multi-server clustering for very large deployments.
Installation Options
Option 1: VICIdial ISO (Recommended for Beginners)
The easiest way to install VICIdial is using the official installation ISO, which packages VICIdial with a pre-configured operating system.
- Download the latest VICIdial ISO from vicidial.org
- Boot your server from the ISO (physical or virtual machine)
- Follow the text-based installer
- The installer configures the OS, Asterisk, MySQL, Apache, and VICIdial automatically
Installation typically takes 20–45 minutes. After installation, VICIdial is accessible via web browser at your server's IP address.
Option 2: Manual Installation on AlmaLinux 8
For those who want more control over the installation:
- Install AlmaLinux 8 on your server
- Install Asterisk (version 16 or 18 LTS recommended)
- Install MySQL/MariaDB
- Install Apache with PHP
- Download and install VICIdial from the official SVN repository
- Run the VICIdial database installation scripts
This approach gives more flexibility but requires Linux administration experience.
Initial Configuration After Installation
Step 1: Log In to the Admin Panel
Open a browser and go to:
http://YOUR_SERVER_IP/vicidial/admin.php
Default credentials:
- Username: 6666
- Password: 1234
Change the default password immediately after first login.
Step 2: Configure Your SIP Trunk
Your SIP trunk is the connection between VICIdial and your phone carrier — the pathway that calls travel through.
Navigate to: Admin → Carriers
Click Add New Carrier and fill in:
- Carrier Name: A label for your carrier (e.g., "Primary Carrier")
- Protocol: SIP
- Server IP: Your SIP provider's server address (provided by your carrier)
- Registration String: Your authentication credentials in the format:
username:password@sip.yourcarrier.com
- Outbound CID: Your outbound caller ID number
- Active: YES
Save and test by placing a test call from the admin panel.
Recommended SIP providers for Pakistan/India/Philippines:
- Twilio (global coverage, API-friendly)
- Vonage (good Asia-Pacific coverage)
- Local PSTN carriers with SIP termination
Step 3: Create Your Dial Plan
Navigate to: Admin → Dial Plans
A dial plan controls how VICIdial formats and routes outbound calls. For most basic setups:
Dial Plan Name: US Domestic (or your target country)
Dial Plan Entry: The number format for your target country
US:
1NXXNXXXXXX(11 digits starting with 1)Pakistan:
92XXXXXXXXXXIndia:
91XXXXXXXXXXPhilippines:
63XXXXXXXXXXEgypt:
20XXXXXXXXXX
Carrier: Select the carrier you just created
Step 4: Create Agent Accounts
Navigate to: Admin → Add User
For each agent:
- User ID: A unique number (e.g., 1001, 1002)
- Password: Set a secure password
- Full Name: Agent's name
- User Level: 1 (agent level)
- Phone Login: The extension the agent will use
- Phone Password: Extension password for SIP registration
Agents log in at:
http://YOUR_SERVER_IP/agc/vicidial.php
Step 5: Upload Your Call List
Navigate to: Admin → Lists → Add List
Create a list and note the List ID number.
Navigate to: Admin → Lists → [Your List] → Upload List
Upload a CSV file with your contacts. VICIdial accepts standard CSV with columns for phone number, first name, last name, and any custom fields.
Required columns:
phone_number, first_name, last_name, address1, city, state, province, postal_code, country_code
Minimum required: phone_number
Step 6: Create Your Campaign
Navigate to: Admin → Campaigns → Add Campaign
Key settings:
Campaign ID: A unique identifier (letters and numbers, no spaces)
Campaign Name: A human-readable name
Active: YES
Dial Method: Choose your dialer type:
- RATIO — Power dialer (1 call per agent)
- ADAPT_HARD_LIMIT — Predictive dialer (stays under 3% abandon)
- ADAPT_TAPERED — Predictive that eases off near the limit
See predictive vs power vs progressive dialer guide for which to choose.
Dial Ratio: For RATIO mode, set to 1. For predictive, this is the starting ratio (typically 1.5–2.0).
Available Only Tally: YES (recommended — only counts agents who are ready)
Answering Machine Detection: Set to Y to enable AMD
AMD Action: What to do with machine-classified calls:
- VOICEMAIL — Play a pre-recorded voicemail message
- HANGUP — Hang up immediately
- MESSAGE — Play a message then hang up
Call Time ID: Select a call time schedule to enforce calling hours
List ID: Enter the List ID of the list you uploaded
Step 7: Configure AMD Settings
VICIdial's default AMD settings work but produce high false positive rates (15–25%) in modern calling environments. This means 1 in 5 live humans gets dropped before reaching an agent.
Navigate to: Admin → System Settings → AMD Settings
Recommended settings for 2026:
AMD Initial Silence: 3000

AMD Greeting: 1200

AMD After Greeting Silence: 900

AMD Total Analysis Time: 5000

AMD Min Word Length: 80

AMD Between Words Silence: 50

AMD Maximum Number of Words: 4

AMD Silence Threshold: 200
For a full explanation of what each setting does, see the best AMD dialer settings guide.
For operations that need higher AMD accuracy without ongoing manual tuning, amdify.io integrates directly with VICIdial as an AI-powered replacement for the built-in AMD engine — reducing false positives to 1–3%.
Step 8: Set Up Call Times
Navigate to: Admin → Call Times → Add Call Time
Configure the hours during which your campaign is allowed to call. VICIdial enforces these automatically.
For US domestic compliance: 8:00 AM to 9:00 PM in the recipient's local time zone.
Important: VICIdial applies call time restrictions based on the area code of the number being dialed. Make sure your dial plan is configured to use the correct time zone mapping for your target country.
Launching Your First Campaign
Once configuration is complete:
- Have agents log in at http://YOUR_SERVER_IP/agc/vicidial.php
- Agents enter their User ID, password, and phone extension
- Agents select "Login to Phone" and wait for the phone to register
- Agents select your campaign from the campaign list
- Agents click "Start" to begin receiving calls
- The dialer begins placing outbound calls automatically
Monitoring Your Campaign
Navigate to: Admin → Real-Time Report
The real-time report shows:
- Active agents and their current status
- Calls in progress
- Calls waiting for agents
- Current dial rate
- Live AMD classification results
Check this during your first campaign run to verify everything is working correctly.
Common Issues for New VICIdial Setups
Agents cannot hear callers / callers cannot hear agents: NAT configuration issue. VICIdial's server needs to correctly identify its external IP address. Configure externip in /etc/asterisk/sip.conf with your public IP.
SIP trunk not registering: Check firewall rules. UDP port 5060 (SIP) and UDP ports 10000–20000 (RTP audio) must be open inbound.
AMD not working: Verify app_amd.so is loaded in Asterisk with asterisk -rx "module show like amd". If not loaded, run asterisk -rx "module load app_amd.so".
Calls dropping immediately: Usually a codec mismatch between your server and SIP carrier. Check that you have matching codecs configured (ulaw/alaw for US carriers).
Agents getting voicemails instead of live calls: AMD false positive rate is too high. Adjust AMD settings as described above or review the AMD not working troubleshooting guide.
Security Hardening (Do This Before Going Live)
VICIdial servers are frequent targets for toll fraud — attackers who gain access to your SIP infrastructure and make unauthorized calls at your expense.
Before going live:
- Change all default passwords — admin panel, agent accounts, database
- Configure Fail2Ban — blocks IPs that make repeated failed SIP authentication attempts
- Restrict admin panel access — whitelist your office IP in Apache config or firewall
- Set SIP rate limits — limit concurrent calls per SIP peer
- Enable call recording — required for compliance in most markets
- Configure firewall rules — only allow SIP traffic from your carrier's IP addresses
Next Steps After Your First Campaign
Once you have a working VICIdial setup:
- Monitor AMD accuracy — audit MACHINE-classified recordings to check for false positives
- Review real-time reports — understand your baseline connect rate and agent utilization
- Configure voicemail messages — record professional voicemail drops for MACHINE-classified calls
- Set up call recording storage — recordings fill disk space quickly; configure rotation or external storage
- Add SIP trunk redundancy — configure a backup carrier for failover. See the VICIdial SIP trunk failover guide
VICIdial has a large community at vicidial.org/VICIdial_forums where you can find help for specific configuration questions. The learning curve is real, but the platform is extremely capable once configured correctly.